If you’ve been battling oil stain removal on your driveway or garage floor, you already know the frustrating truth: concrete doesn’t just hold oil—it drinks it. At Carolina Power Washing, we clean concrete every week, and the homeowners who get the best results are the ones who stop doing the “common sense” stuff that actually makes stains set deeper. Carolina Power Washing Homepage
Let’s break down what works, what doesn’t, and why some DIY attempts leave concrete looking worse than when you started.
Why oil stains are so stubborn on concrete
Concrete looks solid, but it’s porous. Oil seeps into tiny holes and capillaries, then binds to the concrete as it oxidizes. That’s why a fresh spill can often be improved quickly, but an older stain may take multiple rounds—or professional cleaning—to make a noticeable difference.
The goal isn’t just “washing the surface.” The goal is pulling oil up and out of the pores.
First rule: don’t wipe it (and don’t blast it with water)
Here’s what makes stains worse right away:
✅ What not to do on a fresh spill
- Don’t wipe or smear. Wiping spreads oil and pushes it deeper.
- Don’t hit it with a pressure washer immediately. Water can drive oil outward, creating a bigger halo.
- Don’t use bleach. Bleach doesn’t dissolve oil (and mixing random cleaners is how people create dangerous fumes).
A University of Georgia Extension resource (citing Portland Cement Association guidance) puts it plainly: absorb first and avoid wiping, because wiping spreads the stain and drives it into the concrete.
What works best for fresh oil spills (0–24 hours)
If the spill is recent, you have a real advantage. Here’s the exact sequence we recommend:
Step 1: Blot and absorb immediately
- Use paper towels or rags to blot (not wipe).
- Cover the spot with a dry absorbent:
- Clay kitty litter
- Oil-dry
- Sawdust or cornmeal (in a pinch)
This Old House recommends absorbents like sawdust, cornmeal, or baking soda to pull up oil before you start “cleaning.
Pro tip: Grind the absorbent into the surface with your shoe (gently) to increase contact with the pores. Let it sit at least 2–3 hours, longer if the spill was heavy.
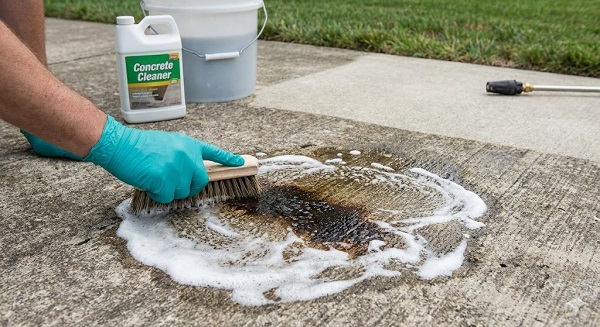
Step 2: Sweep up, then degrease
After you sweep up the absorbent:
- Apply a concrete-safe degreaser.
- Let it dwell (sit) according to the label—rushing this step is where most DIY jobs fail.
- Scrub with a stiff nylon brush (not metal).
Step 3: Rinse correctly
Use a controlled rinse (low to moderate pressure if you’re using a pressure washer), and keep the rinse water moving away from clean areas. Don’t “mist” the whole driveway and hope it disappears.
What works for older, set-in oil stains (days, weeks, months)
Older stains usually need extraction, not just surface cleaning.
Option A: Degreaser + hot water + repetition
This is the most realistic approach for DIY:
- Saturate the stained area with degreaser
- Let it dwell
- Scrub
- Rinse thoroughly
- Repeat (often 2–4 rounds)
Heat helps. Hot water loosens oil and lets surfactants (degreasers) do their job better. That’s one reason professional concrete cleaning often outperforms a garden hose and a brush.
Option B: Poultice method (the “pull it out” approach)
A poultice is basically a paste that dries and draws oil upward as it cures.
Common poultice ingredients:
- Dry cement (left on the stain for a day, then repeated)
- Baking soda paste
- Commercial oil-stain poultice products
UGA Extension guidance (again referencing PCA tips) mentions covering stains with dry cement and repeating until oil stops being absorbed.
This method is slow—but it’s one of the few DIY options that’s actually designed to extract oil from pores.
The DIY mistakes that make oil stains harder to remove
If you want to avoid the “I made it worse” outcome, watch out for these:
1) Pressure washing too early
If you skip the absorbent step and blast with water, you often create a larger, lighter stain ring around the original spot. Now you’re treating a bigger area.
2) Using the wrong chemical
Oil is not algae. It’s not rust. And it’s not “dirt.”
- Bleach won’t dissolve oil
- Many acids won’t help with oil (they can etch concrete instead)
- Random household mixes can be unsafe
3) Not letting products dwell
Degreasers need time to break the oil apart. If you spray and rinse in 60 seconds, you mostly just dilute the product.
4) Spreading contaminated absorbent around
Kitty litter and similar materials can become contaminated and should be handled carefully. Guidance for incident cleanup notes non-biodegradable absorbents include kitty litter/soil/sand/vermiculite and should be collected and contained appropriately.
When it’s time to call a professional
Here’s the honest truth: some oil stains won’t fully disappear, especially if:
- The stain is years old
- The concrete is very porous or cracked
- Oil has repeatedly dripped in the same spot
- You’re dealing with commercial lots, dumpster pads, or heavy vehicle areas
Professional equipment and process matters. For example, Carolina Power Washing uses professional-grade surface cleaners and detergents designed specifically for concrete, which typically delivers a much more even, restored finish than a wand-only rinse.
And just as important: pros can clean the entire panel evenly so you don’t end up with a bright clean circle surrounded by dingy concrete.
The “best” approach if you want the concrete to look consistently clean
If you’re trying to make one stained patch match the rest of the driveway, spot treatment alone can look odd. The cleanest end result usually comes from:
- Treating the stain properly (absorb + degrease / poultice as needed)
- Then cleaning the surrounding concrete so everything blends
That’s why many homeowners choose a full concrete cleaning after stain treatment—because the goal isn’t just “less stain.” It’s a driveway that looks uniformly bright again.